It’s that time of year again. No, I’m not talking about April Fools’ Day – although today is the day for gags. I’m talking about spring, which for me means allergies. A couple of weeks ago the citrus trees here at Viewpoint Golf and RV Resort were blooming. The fragrance of the orange tree in front of our place was pleasant, but it made my eyes itch and water.
Now, everything is flowering. I saw a photo on Facebook this morning posted by our friend, Dave Hobden, of the cactus in his yard blooming. I’ve been taking allergy medicine daily this week. I’m also recovering from another visit to the dermatologist.
I had a few pre-cancer keratosis spots taken care of and a biopsy of a spot near my right eye. This turned out to be squamous cell carcinoma. Last Tuesday I had Mohs surgery to remove the lesion. It turned out to be about a five-hour affair. It didn’t take long for the surgeon to cut away the tissue. The tissue removed has to be examined by a pathologist to ensure that a clear margin is evident. If there’s no clear margin, they make another cut.
In my case, there was a hold-up on the pathology results. Instead of the hour to hour and half I was told to expect, it took two and half hours to get the report. It was clear, so they took me back into an exam room to have the incision closed up. There was another delay as the surgeon had to finish up another surgery first. It was another hour of waiting in small exam room. Good thing I brought my Kindle. I’ll go back to the dermatologist office on Tuesday morning for follow-up and have the stitches removed.
I mentioned our visit with my youngest daughter, Shauna, and her family in my last post. I also mentioned plans to go out for sushi with my oldest daughter, Alana, and her husband, Kevin. It turned out that my middle daughter, Jamie, and her partner, Francisco, were able to join us as well. We had a great evening. It was nice to visit with all three of my daughters that week.
The two weeks since my last post have been fairly routine. The Viewpoint Concert Band had their final performance of the season on Sunday, March 19th. They had a good crowd in the ballroom and most of the people we talked to afterward said they thought it was the best performance they had heard from the band. I think the selection of the music performed was the reason for all of the positive feedback.
Now that the last band concert of the season is behind her, Donna’s schedule has freed up about 10 hours per week. That’s how much time she devoted to practice on her own and rehearsals with the band. But she doesn’t often operate with free time on her calendar. Not only is she president of the board for the band, she’s now secretary of the Viewpoint Tennis Club. Her golf league ended their season, but she’s maintaining a standing tee-time with friends on Tuesday mornings. She’s also putting more time into gardening.
We had our outreach event with the East Valley Astronomy Club (EVAC) here on March 22nd. I arranged the event with one of the EVAC activity coordinators, Claude, and the events director here at Viewpoint. The topsy-turvy weather we’ve had this winter didn’t exactly cooperate. We had rain in the morning and some clouds lingered in the afternoon/evening. Temperatures were on the cool side – the high was only 61 and it dropped into the low 50s after sunset. We had a fairly good turn-out in spite of the conditions. We had five club members set up their gear and I’m guessing about 40 people came out to see planets and stars. I’m not really sure of the number of people – I was busy and only saw those that came by my rig.
Last Saturday, FedEx dropped off four boxes for me. They came from Hollywood General Machining – it was my new Losmandy GM811 mount!

I got busy and had it assembled in no time.

This mount has a much higher payload capacity than my SkyWatcher HEQ5 had. There’s nothing wrong with the HEQ5, but I wanted the higher capacity for the AT115EDT, which put the HEQ5 at its limit. With GM811, I can go much larger with my astrophotography gear without straining the mount. It’s also easier to disassemble and move the GM811 and it sets up quickly. I’m pretty excited by the new mount. My HEQ5 was sold to my astronomy buddy, Marty, and he was excited enough to pick it up Saturday afternoon.
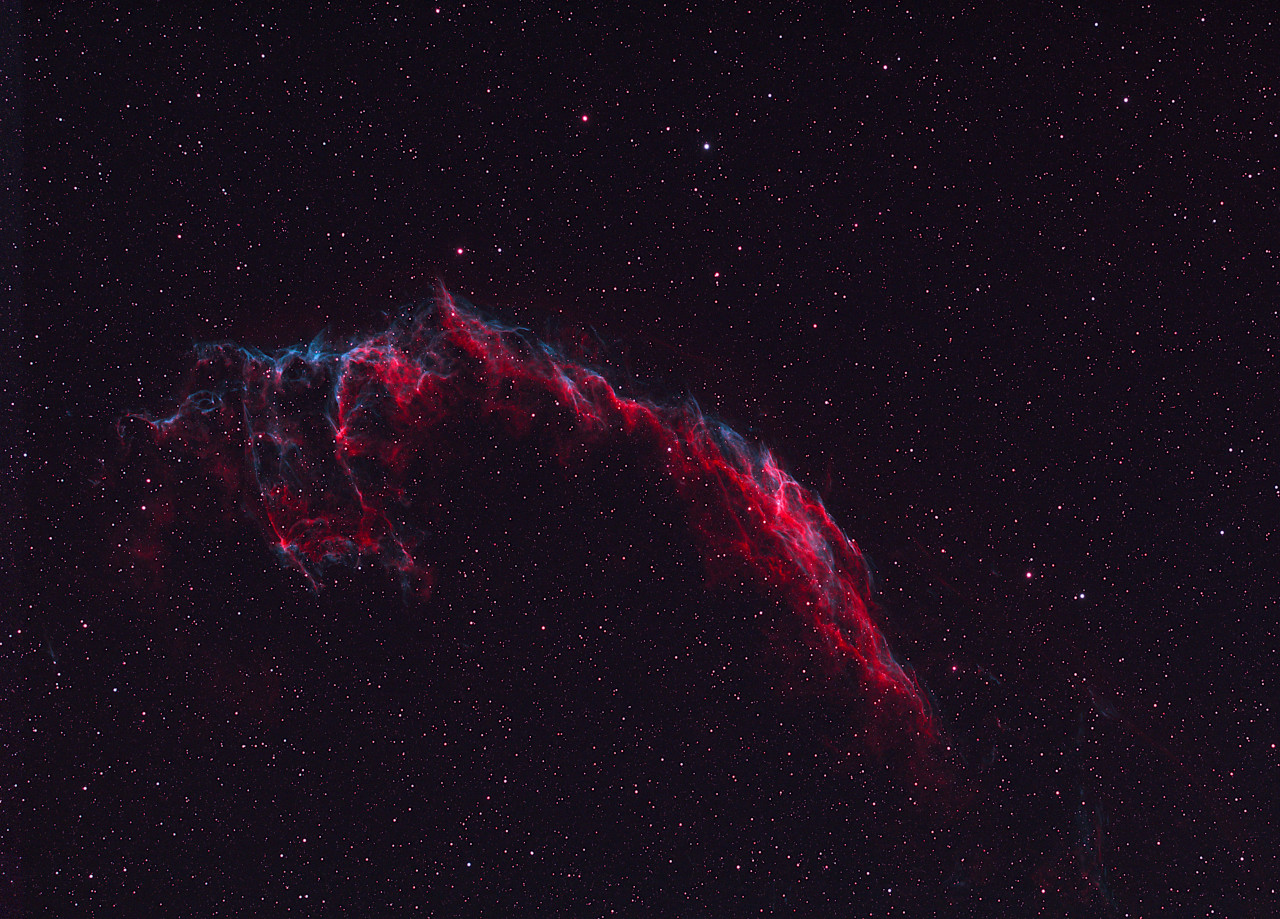
A week ago Friday, I started imaging another nebula called the Tadpoles Nebula. I wanted to capture more data before finalizing the image. I planned to continue shooting it from the backyard with my new mount, but I had a problem. I ordered an iPolar scope with the mount to use for polar alignment. Polar alignment is the first step for calibrating a German Equatorial Mount. I had to wait until Monday to contact Losmandy about the missing optional equipment. They sent it out with an apology Monday afternoon.
I tried to attain polar alignment with software to start calibrating, but I wasn’t sucessful Tuesday night. I think I know where I went wrong, but cloudy nights have prevented me from trying again. I was hoping to have the iPolar scope by now, but hit anothe snag. It was addressed improperly – they labeled it 870 E University Drive instead of 8700 E University Drive. It was sent back to California and they will re-label it and send it back to me. Meanwhile, I’m planning to try the software-based polar alignment again tonight, so I can finish capturing the nebula.
When I came home from the dermatologist on Tuesday, I found a package from Germany that UPS dropped off. It came from Markus Ludes at APM Telescopes in Sulzbach, Germany. I ordered an APM Super ED 140/980 refractor. This is a large refractor with an objective lens diameter of 140mm (5.5 inches) and a focal length of 980mm (38.6 inches). The focal ratio therefore is F/7 – focal ratio is the focal length divided by the aperture diameter and is used to determine certain lens characteristics by photographers.


Although I had to deal with exchange rates, import duty and customs broker fees, it was about $200 cheaper for me to import the ‘scope from Germany than to buy from the US distributor. I also ordered an APM-Riccardi field flattener with the ‘scope. This is an accessory that’s only used for astrophotography – it’s not needed for visual use. I have high-quality field flatteners on all three of my refractors. This one, designed by Massimo Riccardi is very highly regarded. It’s attached to rear of the ‘scope in the photos above.
I wouldn’t have considered this telescope if I didn’t have the Losmandy mount. It would overload my old mount. The mount is probably the most important piece of astronomy equipment, especially for astrophotography. It’s the foundation for everything else.
All of the activities are winding down here at Viewpoint. The snowbirds are due to migrate back north. Many of the Canadian visitors have already left. By the end of this month, at least 60% of the residents will have gone. It’s too bad, because the weather forecast is finally looking good. Other than a couple of days under 70 degrees, we should be in the upper 70s to mid-80s for the rest of the month.


